My Moroccan/North African home adventures: Chicken Tajine with Green Tea Couscous

In case you haven’t notice – I haven’t posted for an extremely long time. I blame studying for the Bar, and life. I’m sorry! But I’m back and I promise that this time, I’m here to stay. I’m a Lady Chatterly and I need a pulpit.

Anywhooo … here’s a recipe that I’ve been holding onto for quite sometime. It’s lovely, it’s easy and it’s an explosion of flavors in your mouth. The perfect triad!

I’m an adventurous home cook. Please notice my qualifier because I’m prone to not measure precisely when I cook, and often realize a tad too late that I forgot to write down the approximate measurements of spices sprinkled, vegetables chopped or wine used to deglaze a pan (is there such a thing as too much wine?). Luckily, the wonderful aspect of this dish is that it is very forgiving and to an extent, it can be easily adjusted to accommodate various palates. This is a Moroccan dish, so I’d encourage you to embrace a bit of the tang. I incorporated preserved lemons, olives, capers, harissa … mmmm, my mouth is watering just thinking about it. These are lovely Mediterranean flavors that sometimes takes a bit getting used to, but once you do – I can easily assure you that you’ll love it!

photo (5)

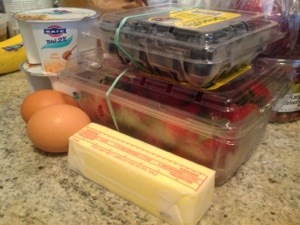
I forgot to take a picture of the finished dish, so this is all you get.

Chicken Tagine

  • 2 teaspoons paprika
  • 1 stick of cinnamon, broken in half
  • 1/2 teaspoon saffron (about a pinch or so)
  • 1/2 teaspoon ground cinnamon
  • 1/2 teaspoon freshly ground pepper
  • 2 Tbsp olive oil
  • 1 chicken, 3-4 lbs, cut into 8 pieces (or use the same weight amount of boneless, skinless chicken breasts – cut in half)
  • Salt
  • 1 onion, cut in half and in thin slices
  • 3 cloves garlic, chopped
  • The rind from 1 preserved lemon, rinsed in cold water, pulp discarded, rind cut into thin strips (if you don’t have preserved lemon, use whole thin slices of regular lemon)
  • 1 cup kalamata olives, pitted and roughly chopped
  • 1/2 cup vegetable broth
  • 1/2 cup golden raisins
  • 1 can chickpeas, drained and rinsed
  • 1 small spoonful of harissa (only if you like heat – if you’re not sure, just add to taste to individual servings)

Directions

1 Pat dry the chicken pieces and sprinkle both sides with salt, pepper, paprika and ground cinnamon. Let the chicken stand for about 10 minutes in the spices.

2 If you are using a tagine, place it on a heat diffuser on the heating element to prevent the tagine from cracking (it also distributes the heat evenly). If you do not have a tagine, you can use a thick-bottomed, large skillet with a cover.

Heat the olive oil in the tagine on medium high heat. Brown chicken on both sides, starting with skin side down, in the tagine . Remove chicken from the tagine and repeat with the remaining chicken. Remove all chicken and reserve to add to tagine at a later point.

Lower the heat to medium, and saute onions for a few minutes. Add in garlic and saute for an additional 30 seconds. Sprinkle in saffron, making sure to rub it between your fingers to release its flavors. Add in the broken cinnamon sticks. Stir once  and add chicken back to the tagine.

5 Add the lemon slices, olives, raisins, chickpeas, and the vegetable broth. If you’re adding harissa to the entire dish, now would be the time to do so. Stir everything carefully once. Lower the heat to low, cover, and cook for about an hour, until the chicken is cooked through and falling apart. Check the tagine occasionally to make sure that the broth hasn’t completely evaporated – add supplemental broth as needed.

Serve with green tea couscous (recipe below).

Green Tea Couscous (adapted from Rachel Ray)

  • 1 tablespoon extra-virgin olive oil
  • 4 scallions, finely chopped
  • Salt and freshly ground black pepper
  • 1 1/2 cups vegetable broth or water (I use water because it reduces sodium intake and the tagine dish is certainly flavorful enough)
  • 1 single-serve bag green tea
  • 2 tablespoons honey
  • 1 1/2 cups couscous
  • 1/2 cup finely chopped mint leaves, a couple of handfuls
  • Salt and freshly ground black pepper

Directions
Heat the olive oil in a medium sauce pot over medium heat and add the scallions. Season with salt and pepper and saute 2 to 3 minutes. Add water and bring to a boil, secure tea bag to handle of the pot, and let steep for 1 minute. Remove the tea bag, stir in honey and couscous. Turn off the heat, stir in mint, and cover the pot. Let couscous stand 5 minutes, then fluff with fork and transfer to a serving bowl. Season with salt and pepper, to taste, toss to combine and serve.

This is perfect for fall weather – I hope you enjoy it!

My Momma’s Mango Jam

20130524-230955.jpg

My mother’s birthday is quickly approaching. As the only recipient of her slightly-less-than-subtle hints about her love of mango jam and how she hasn’t tasted it since her childhood in Jamaica, I decided that there’s no time like the present to supplement my canning repertoire! Up until this moment, I’ve tried my hand at canning exactly once before (strawberry jam made two ways and it is tasty!), so I hoped that things would go off without a hitch once again.

Let’s just say that it could have gone a bit better. The preparation and jam itself all came together quickly and easily as expected. But in canning … sometimes the lid does not POP the way it should. Either way, the jam is darn tasty. Luckily one of the two canned lids processed perfectly, so my momma will be able to store it for quite some time. The other jar will need to be kept in the refrigerator, so she can eat that as soon as she wishes.

20130524-224042.jpg

To can the jam, prepare the canning jars and fresh lids by washing them and letting them sit in simmering water. It’s better to put hot jam in hot jars.

Here’s the recipe:

Ingredients :
500 gm. peeled & chopped mangoes
188 gm. sugar
2 tbsp. lemon juice
1 tbsp. Balls low-sugar pectin
1/4 pat of butter

Preparing Jam:
1. Place chopped mangos and lemon juice in a pot and stir to combine. Stir in pectin until dissolved. Bring mango mixture to a strong boil.
2. Add the pat of butter to the mixture and stir it in. This helps reduce the amount of foam that will need to be skimmed off later on in the process.
3. Add sugar all at once to the pot. Return mixture to a full boil that can’t be stirred down. Boil hard for 1 minute 30 seconds.
4. Check the viscosity of the mixture. If it is not to your liking, boil and stir for at most an additional 1 minute 30 seconds. Remember that as the mixture cools, it will thicken up especially with the additional pectin added to the mixture.
5. Skim foam off the top.
6. Remove one jar at a time from the simmering water. Pour water back into the pot. Be careful! Using a wide-mouth funnel, fill each jar with jam. Fill jars so that they have 1/4-inch of space at the top.
7. Run a knife down the side of the jar – this helps get rid of air bubbles.
8. Wipe rim of jar with a dampened cloth or paper towel to remove any excess jam.
9. Remove center lid from simmering water and place it on top.
10. Lightly/loosely screw bands on jars. The full tightening of the bands will happen later.
11. Repeat with all jars, then gently and carefully lower the jars back into the water.
12. Place lid on the pot and bring water to a full boil. Boil hard for 10 minutes.
13. Turn off heat and allow jars to remain in hot water for an additional five minutes.
14. Remove jars from water using a jar lifter, and allow them to sit undisturbed for 24 hours.
15. After 24 hours, remove screw bands and check the seal of the jars. If the center lids have any give, or if they haven’t POPPED, then they will need to be stored in the fridge.
16. Eat whenever you crave a taste of mango goodness. Yum!

20130524-230727.jpg

Recipe: Fruit and Yogurt Muffins

As I promised, here’s the recipe for my fruit and yogurt muffins. I call them this because of my picky family. Some of us prefer blueberries, some of us prefer strawberries and there are others of us who are stuck with bananas when the strawberries grow moldy. Then there are the select few that get stuck with blueberry + banana yogurt muffins when there aren’t any other options. So, in an effort to be concise, these are simply fruit and yogurt muffins.

I must admit that I did not create this recipe: it came from Savory Sweet Life in the form of blackberry yogurt muffins. However, we do not like blackberries in this household, so blueberries and strawberries bananas it is!

20130521-230122.jpg
Do you see those deceptive strawberries??? For shame!

Here’s Savory Sweet Life’s recipe, with my minor modifications.

Blackberry Fruit and Yogurt Muffins
Author: Savory Sweet Life, as adapted by Curly hair Caribbean flair
Recipe type: Bread
Prep time: 10 mins Cook time: 25 mins Total time: 35 mins
Serves: 12 16

Ingredients
8 tablespoons (1 stick) unsalted butter, at room temperature
½ cup sugar
½ cup dark brown sugar, packed
2 eggs
1 cup 2% honey Greek yogurt
¼ cup skim milk
1 teaspoon pure almond extract
1 cup all-purpose flour
½ cup whole wheat flour
2 teaspoons baking powder
½ teaspoon baking soda
½ teaspoon kosher salt
1½ cups fresh blueberries, or 3/4 cup of two different fruits that are similar in size

Instructions
Preheat the oven to 400 degrees F.
Using a hand/stand mixer, cream the butter and sugars on medium speed for 3 minutes until light and fluffy.
Add the eggs one at a time, waiting for each egg to be mixed in before adding another. Add the yogurt, milk, and almond extract. Mix until the yogurt is combined.
Reduce the mixer speed to low and add the flours, baking powder, baking soda, and salt. Mix the batter until smooth and there are no lumps, about 2 minutes.
Gently fold in the blueberries/strawberries/diced banana/what have you.
Spray a generous amount of non-stick spray into a crumbled paper towel and grease the top of a muffin tin (I’m lazy and I never do this step. I’ve never had a messy post-baking cleanup yet.) Line the tin with 12 paper baking cups. (See my notes below: you may need two muffin tins.) Fill each tin ⅔ full.
Bake muffins for 12 minutes at 400 degrees. Reduce the oven temperature to 350 degrees and bake for 13 more minutes or until the center of the muffins springs back when touched.
Allow the muffins to cook in the tin for 3-5 minutes before removing.

A few notes:
I only have skim milk in my house, so that’s what I used. It worked just fine. My muffins are incredibly moist, and are consistently so each time that I make them.

Likewise, I could only find Fage’s individual 2% yogurt cups with the honey mix-in. It worked great! I personally love the rich thickness that Greek yogurt has, so that’s what I use. On occasion, I’ve used my normal Fage 0% yogurt, and mixed in a few tablespoons of whatever honey I’ve happened to have on hand. This is extremely successful! When in doubt, just fudge it out! (My new motto, haha.)

My partner loves blueberries, so I always make half a batch of muffins with blueberries. Normally, I reward myself for being so thoughtful by making the other half of the batch of muffins with strawberries that I’ve dehulled, and quartered. No such reward this time, however, because I waited too long to use said strawberries. Mold is not fun. So, I frantically looked around my kitchen, and saw … a banana. I know, I was dubious about the results, especially because I do not like banana bread. :0 I sliced the banana in half and each half in half, then diced those halves into slightly larger than one inch pieces. I mixed it in to my half of the muffins, baked them all and … What do you know?! Those banana yogurt muffins were darn tasty! The banana pieces were the appropriate amount of warm, malleable and not overly banana-y. Absolutely delish!

20130521-232654.jpg
Lovely muffin batter, just waiting to be baked.

Last note: for some reason, whenever I make these muffins, I always end up with 16 muffins, instead of 12. I’m not complaining – I just thought you should know.

So, take a crack at this recipe! Toss whatever fruit or berry you like into this batter, it’s pretty forgiving. Your taste buds will thank you for it!